 Save
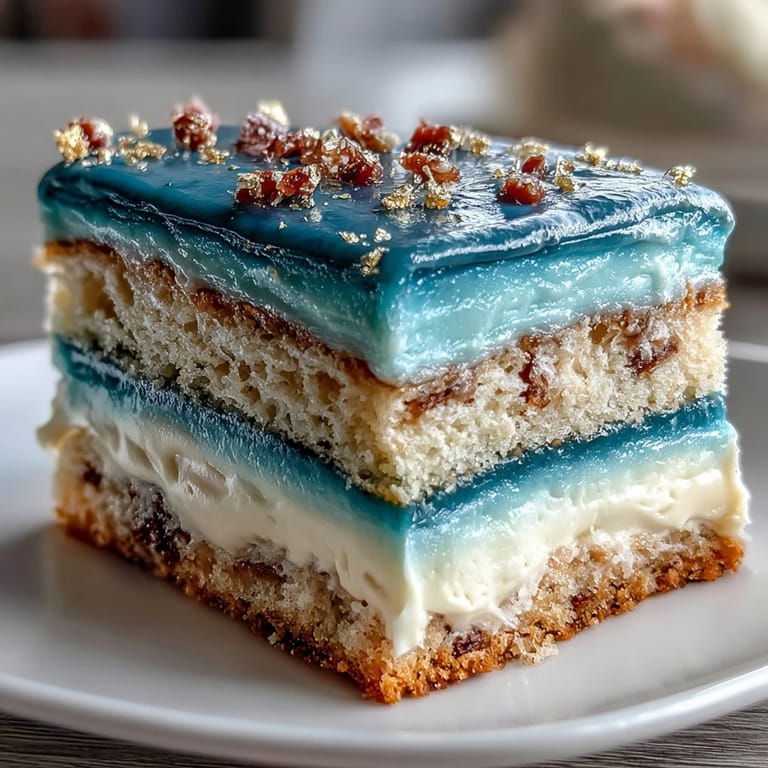
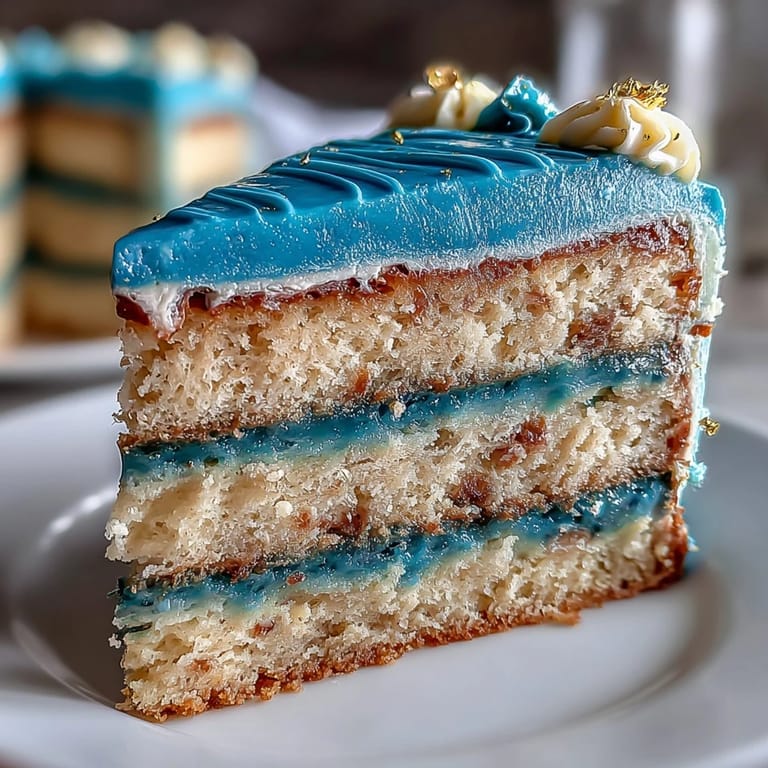
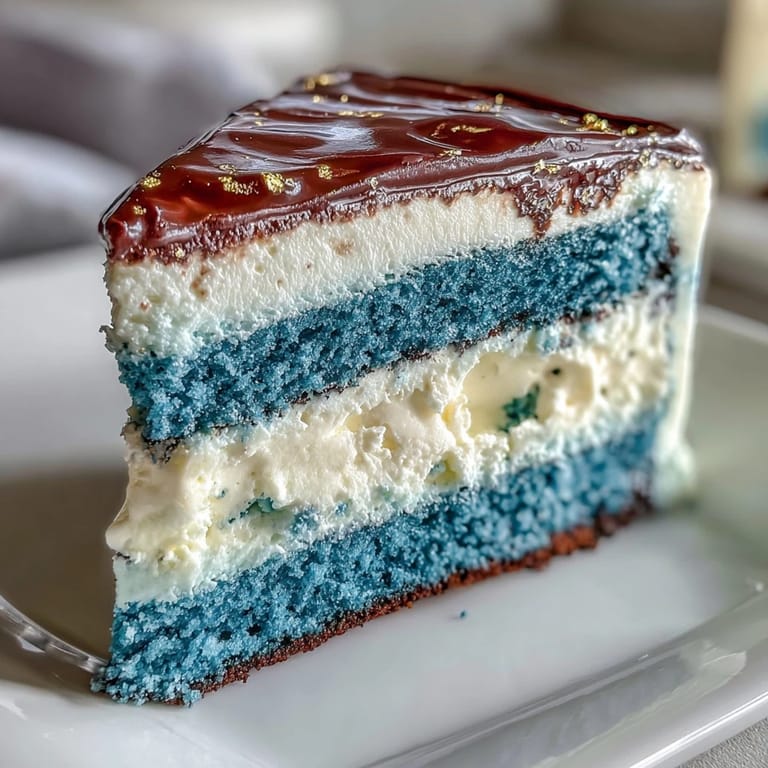
Save The scent of vanilla and butter wafted through the air as I experimented with different shades of blue for this graduation cake—there was a particular thrill in watching the colors morph from pale to midnight, each layer richer than the last. On a rainy afternoon, I found myself humming along to my playlist, smudges of food coloring on my fingers and flecks of gold leaf clinging to the countertop. I never used to worry much about cake decorating, but for this occasion, the stakes felt higher, and the ombre layering became a playful challenge rather than a daunting task. The result was a cake both bold and celebratory, with deep blue layers fitting for any milestone moment. Each gold accent sparked a little pride, as if every streak was a tiny congratulatory handshake.
One Saturday, I made this cake for my cousin’s graduation—his friends hovered near the kitchen, sneaking peeks at the emerging blue layers. Their laughter punctuated the mood, and when I finally revealed the finished cake with streaks of gold, someone joked it looked fit for a king. The mess on the floor didn’t matter, nor did the hurried scramble to find enough space in the fridge. In that busy, bright kitchen, triumph felt sweeter than any dessert. The cake became the backdrop for stories and spontaneous congratulations.
Ingredients
- All-purpose flour: Use a kitchen scale for accuracy—a lesson I learned after one lopsided layer.
- Baking powder & baking soda: Together, these ensure a tender crumb that rises evenly with the gradient color.
- Salt: Just a pinch balances the sweetness and enhances those buttery blue layers.
- Unsalted butter: Room temperature butter blends smoothly and makes the cake moist—don’t skip softening.
- Granulated sugar: Creaming sugar properly with the butter gives you a light, fluffy base.
- Eggs: Adding one egg at a time creates stable cake layers; bring them to room temperature for best results.
- Vanilla extract: Pure vanilla rounds out the flavor and isn’t overshadowed by the food coloring.
- Whole milk: Room temperature milk prevents curdling and keeps the batter silky.
- Blue gel food coloring: Gel is vivid and won’t thin the batter; navy, royal, and light blue give the ideal gradient.
- Powdered sugar (for buttercream): Sifting avoids lumps—a real lifesaver for smooth frosting.
- Milk or cream (for buttercream): Adjust for desired spreadable consistency; cream adds richness.
- Edible gold leaf or gold dust: Test small areas first; gold leaf is fragile but transforms even small mistakes into elegance.
- Clear alcohol (vodka or lemon extract): Only needed to mix gold dust—evaporates quickly so it won’t affect flavor.
Tired of Takeout? 🥡
Get 10 meals you can make faster than delivery arrives. Seriously.
One email. No spam. Unsubscribe anytime.
Instructions
- Get everything ready:
- Preheat your oven to 350°F and set out three 8-inch pans with parchment paper—feel free to tap the pans on the counter for good luck.
- Mix dry ingredients:
- Whisk flour, baking powder, baking soda, and salt together until the powdery scent reminds you of fresh cake batter.
- Cream it up:
- Using a mixer, beat butter and sugar until airy; it should look pale and fluffy, and the bowl will feel warmer in your hands.
- Add eggs and vanilla:
- Drop in eggs one at a time and mix in vanilla—the batter should become glossy, almost like satin.
- Bring it together:
- Alternate adding your flour mixture and milk to the wet ingredients, finishing with flour; stop as soon as it’s combined.
- Color the batter:
- Divide evenly into three bowls, blending blue shades from light to dark—keep a paper towel nearby for colorful spills.
- Fill and bake:
- Pour each batch into a pan, smoothing gently. Bake for 25–30 minutes, until a toothpick comes out clean and the kitchen smells like celebration.
- Cool and prepare layers:
- Let the cakes cool for 10 minutes in their pans, then move to racks; they should feel bouncy and light.
- Make buttercream:
- Beat butter until creamy, then gradually add powdered sugar. Mix in vanilla, salt, and milk or cream until fluffy and smooth.
- Divide and tint frosting:
- Set aside 1 cup for crumb coating; tint the rest with dark blue coloring for the finishing touches.
- Assemble the cake:
- Level each cake layer, then place the darkest one on your plate. Spread a layer of buttercream, stack the next layer, and repeat until the lightest sits on top.
- Crumb coat:
- Wrap the cake in a thin layer of regular buttercream and chill for 20 minutes—this helps the final coat glide on.
- Final frosting:
- Frost with dark blue buttercream; blend lighter shades toward the top for that ombre effect, letting your spatula dance around the edges.
- Add gold accents:
- Apply edible gold leaf or brush on gold dust mixed with alcohol—go for streaks or borders and admire your handiwork.
- Chill and serve:
- Let the finished cake chill until ready; keep an eye on it so the decor stays fresh.
 Save
Save When the cake was finally sliced and served, gold flakes caught the light, and the boys posed for photos—one layer at a time, the ombre blues looked glorious in the cross-section. I realized then how a homemade cake becomes a shared experience, not just a dessert. Later, they sent photos to relatives abroad, proof that the occasion was memorable in both taste and color.
Making Color Work for You
Playing with gel food coloring feels a lot like painting—with the right tools and patience, you can achieve vivid blue gradients that never fade or run. I found mixing a pinch at a time and using separate bowls for each shade made the ombre effect truly pop. If you get food coloring on your hands, a bit of lemon juice and baking soda helps clean it up quickly. Color seems to bring confidence to the cake, turning every layer into a showpiece.
Buttercream Consistency Matters
It’s easy to overlook buttercream texture, but a spreadable, smooth frosting is essential for clean layers and elegant finishing. The trick is to add milk gradually, and if you accidentally overmix, a few extra tablespoons of powdered sugar will save the day. I always test the frosting with an offset spatula; if it forms soft peaks, it’s just right. Don’t be afraid to chill the bowl for a few minutes if your kitchen gets warm mid-decorating.
Last Touches That Make It Special
Gold leaf needs a gentle touch—it tears easily but even small fragments add sparkle. Decorating in natural daylight helps spot flaws and makes the gold glimmer more boldly. For added flair, graduation-themed toppers or chocolate stars nestle beautifully between the gold. The right mood lifts every step, so invite someone to share in the laughter as you finish the cake.
- Set aside a cake slice for next-day photos—the colors stay vibrant.
- If gold accents dry unevenly, brush gently with extra clear alcohol.
- Let cake slices come to room temperature before serving for best flavor.
 Save
Save This cake is a celebration in itself, and each step brings a little more cheer—share it generously and let the gold and blue mark the moment. Here’s to making milestones sweeter, one homemade layer at a time.
Recipe FAQs
- → How do I achieve the ombre effect in the cake layers?
Divide batter into separate bowls, then tint with varying blue shades for a gradient from light to dark.
- → What is the best way to decorate with gold accents?
Use edible gold leaf or gold dust mixed with clear alcohol to brush streaks or edges onto the cake for elegance.
- → Can I make more than three ombre layers?
Yes, using four or five layers with increasing blue intensity creates a more dramatic look and impressive height.
- → What tools help with smooth buttercream frosting?
An offset spatula, cake turntable, and parchment-lined pans assist in achieving even layers and a flawless finish.
- → How should the cake be served for best presentation?
Chill the finished cake, slice with a sharp knife, and pair with sparkling cider or Prosecco for festive flair.
- → Are the decorations safe for consumption?
Confirm that gold decorations are labeled edible and food-safe before applying to ensure safety for guests.